
Create addon plan
Create Addon Plan – Postpaid and Prepaid
1. On the top menu, click Plan to view the Rate Plan details. Refer to the following screen.
Figure 1 Pan
Note: By default, the postpaid plan screen is displayed.
Note: To create an add-on plan for prepaid connection, click Prepaid tab.
2. Click

to add a new prepaid plan. Refer to the following screen.
Figure 2 create new prepaid plan
2. After clicking the button, the following screen is displayed.
Figure 3 base or addon plan
Note: By default, the Plan type is Base.
3. Select Addon as Plan type. Refer to the following screen.
Figure 4 addon plan
4. Enter or select the following information in the corresponding fields.
Field | Description |
|---|---|
Basic Information | |
Plan Type | Addon – Addon are additional plans, an endpoint can avail in addition to the base plan. Endpoint can avail multiple Addon plans. |
Plan Name | Enter a name for the addon plan |
Status | Select the status of the rate plan. For example, Active or In-Active. |
Service Profile | Select the service profile for the Rate plan in the drop-down list. |
Description | Enter the brief description of the plan. |
Currency | Depending on the currency of the Enterprise, currency type is auto-populated. |
PCRF Rule | Select the PCRF rule in the drop-down list. For example, |
Activated by | This field is displayed when you select "Addon" as plan type. |
Addon Priority | This field is displayed when you select "Addon" as plan type. |
Roaming Profile | Select the Roaming Profile for the plan in the drop-down list. |
5. Click Next. The Advance details screen is displayed. By default, the Notification detail is displayed.
Figure 5 Advance
6. Click Add New Notification to add a Notification. Refer to the following screen.
Figure 6 Notifications
7. After clicking the button, the following screen is displayed.
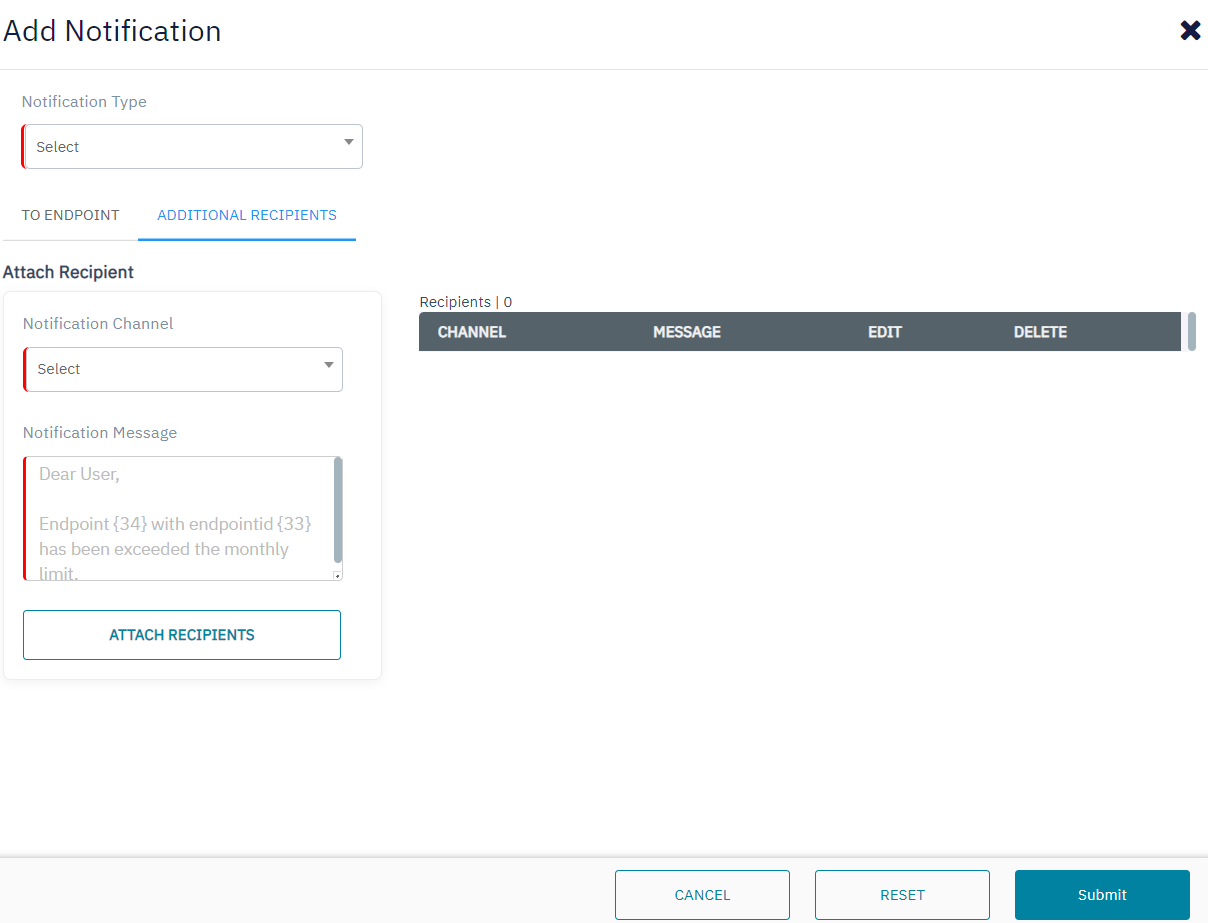
Figure 7 Add Notifications
8. Enter or select the following information in the corresponding fields. Fields marked with "|" are mandatory.
Field | Description |
|---|---|
Notification Type | Select the Notification type in the drop-down list. |
Threshold type | This field is displayed when you select the Notification type as "Addon consumption notification-DATA" or”Addon consumption notification-NB-IOT” or "Addon consumption notification-SMS". |
Threshold | By default, this field is not displayed. This field is displayed when you select "Consumption" as Threshold type. |
Notification Channel | Select the channel through which the notification needs to be sent. Note: Email and API is applicable only for Additional recipients |
Notification Message | Enter the notification message to be triggered for this Notification type. When click on Notification Message box below explanatory popup will be displayed. |
Event Scenarios: (If the endpoint addon is configured with 2 notification Activation and Subscription)
If the endpoint addon - Activated By is set to “On Usage”, only the subscription occurs. The "Addon Subscription" notification is triggered. Once data usage is initiated by the endpoint then the "Addon Activation" notification will also be triggered.
If the endpoint addon - Activated By is set to “Immediate”, both subscription and activation occur simultaneously. Both "Addon Subscription" and "Addon Activation" notifications are triggered.
For an OEM account, the new Addon subscription/Activation notification will be triggered only when Endpoint moving to the Active state.
9. Click Attach Message.
10. After clicking the button, the following screen is displayed.
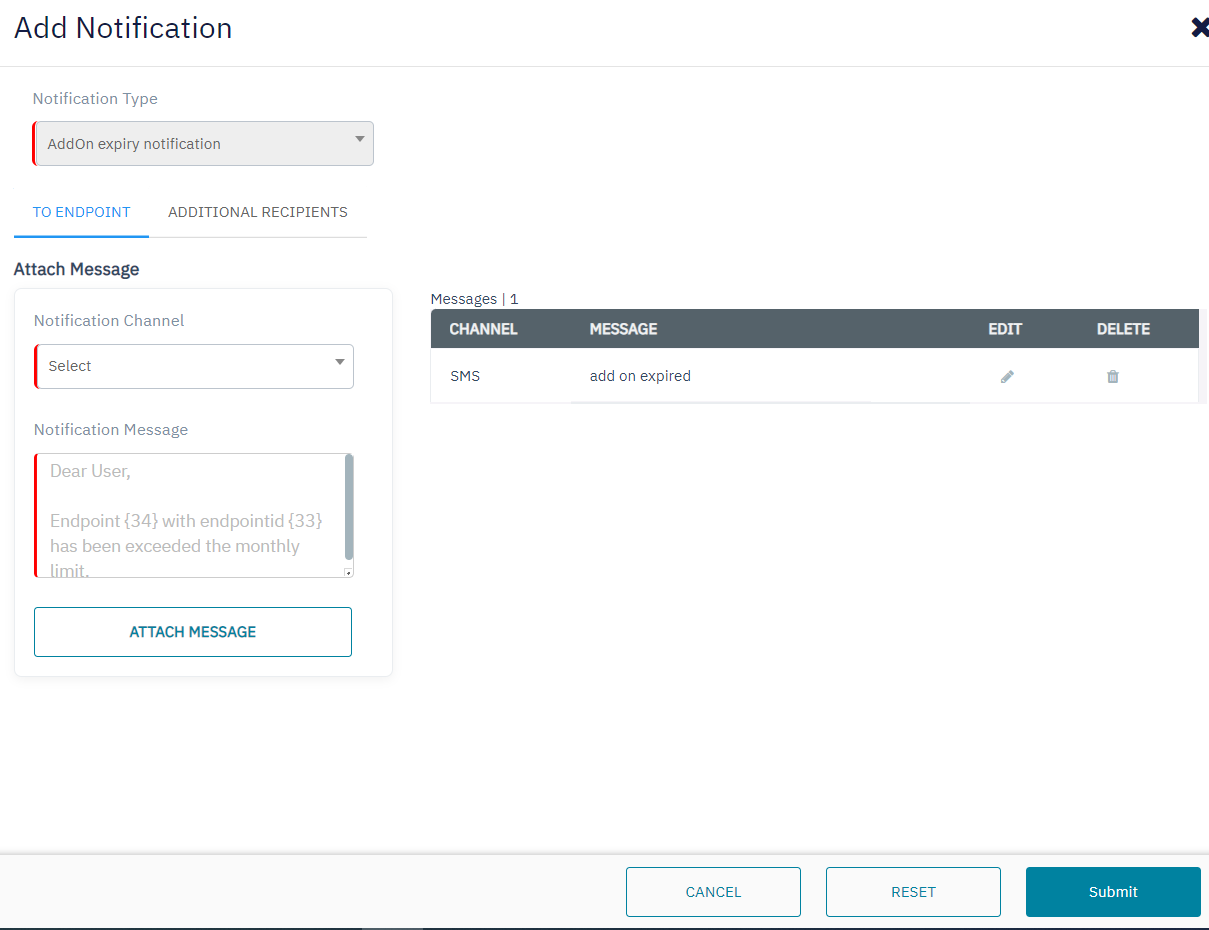
Figure 8 Add Notifications
11. Click
to modify the attached message.
Note: You can modify only the Notification message field.
Click
to delete the attached message
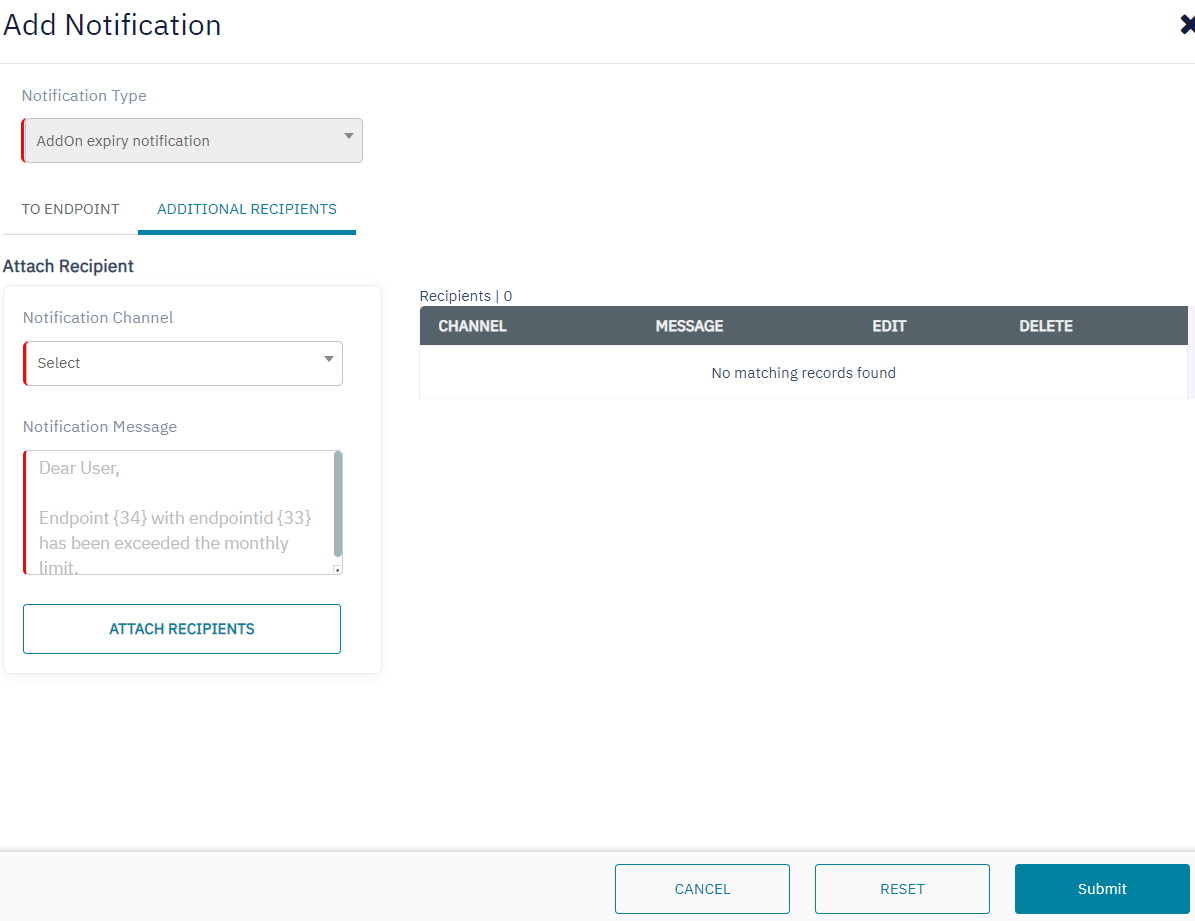
Figure 9 Additional Recipients
Note: Follow the above-given procedure to configure additional recipients.
Note: It is not mandatory to add additional recipients.
12. Click Submit to attach the Notification to the rate plan. The following screen is displayed.
Figure 10 Notifications
13. On the Notification screen, click
to edit the Notification details.
14. On the Notification screen, click
to delete the Notification details.
15. After adding the Notifications, click Charges to add charges to the rate plan. Refer to the following screen.
Figure 11 Charges
16. Click Add Charges to add charges to the rate plan. Refer to the following screen.
Figure 12 Add Charges
17. After clicking the button, the following screen is displayed.
Figure 13 Add Charge
18. Enter or select the following information in the corresponding fields. Fields marked with "|" are mandatory.
Field | Description |
|---|---|
Mode | Select the Charge mode form the drop-down list. |
Category | Select the Charge mode form the drop-down list. For example One-off fee and SIM activation |
Charge name | Depending on the category selected, the charge name is displayed. |
Value | Represents the fixed amount that will be charged periodically |
Factor | This field is displayed when you select "Recurring" as Mode. |
Validity | Select the frequency of the charge. For example Month, Year, Day |
19. Click Add. The following screen is displayed.
Figure 19 Charges
20. On the Charge screen, click
to edit the Charge details.
Note: You cannot modify Mode, Category, and Charge name of the Category.
21. On the Charge screen, click
to delete the Charge.
22. After adding the Charges, click Benefits to add a Benefit to the rate plan. Refer to the following screen.
Figure 20 Benefits
Note: Benefits are bonuses provided at the time of provisioning to the endpoint.
23. Click Add New Benefit to add Benefit to the Rate plan. Refer to the following screen.
Figure 23 Add New Benefit
24. After clicking the button, the following screen is displayed.
Figure 24 Add Benefits
25. Enter or select the following information in the corresponding fields. Fields marked with "|" are mandatory.
Field | Description |
|---|---|
Benefit category | Select the Benefit Category in the drop-down list. |
Benefit | Based on the Benefit category selected, select the Benefit type. |
Value (MB) | Based on the Benefit selected, the corresponding value field is displayed. For example, this field is displayed when you select "Data"/”NB-IOT” as Benefit |
Value (Count) | Based on the Benefit selected, the corresponding value field is displayed. For example, this field is displayed when you select "SMS" as Benefit |
Action | Select an Action to be done with the benefits on the account. |
Ratezone | By default, this field is not displayed. This field is displayed when you select "Addon Account (Units)" as Benefit category. |
26. Click ADD to add the Benefit.
27. After clicking the button, the following screen is displayed.
Figure 25 Benefits
28. On the Benefit screen, click
to edit the Benefit details.
29. On the Benefit screen, click
to delete the Benefit details.
30. Click Submit. A confirmation message is displayed, indicating that the rate plan is created successfully.
Figure 26 Confirmation Message
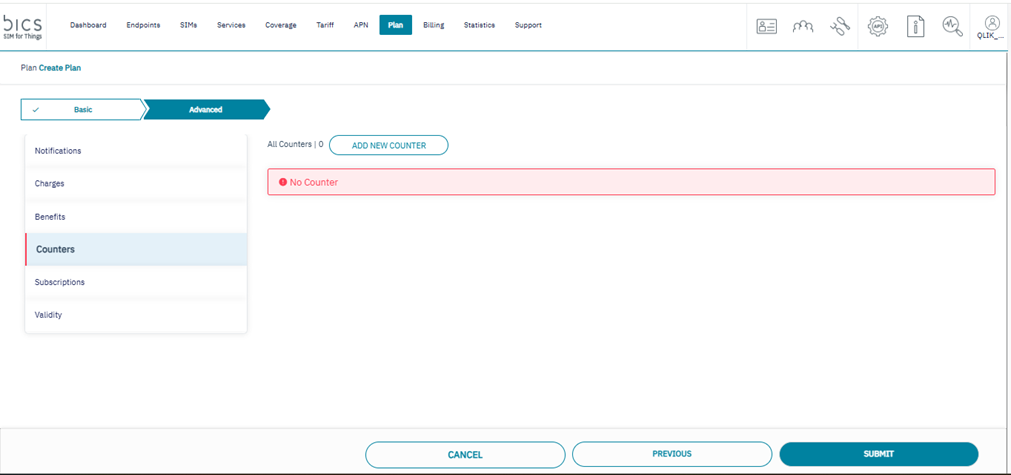
Add an new “counter” to addon plans for throtteling data. The new Addon plan counter is specifically applicable to Endpoint Addon plans and includes only Throttle options.
Throttling options: 128Kbps, 256Kpbs, 384Kpbs, 512Kpbs, 1250Kpbs, 1Mbps, 2Mbps, 5Mbps, 10Mbps, 20Mbps
The Addon Counter is applicable only on Endpoint Addons.
The Addon Counter has only Throttle options and does not include BLOCK options.
The counters in the addon behave the same as the counter in the base plan for all services such as DATA, NBIOT, and LTEM.
Multiple addons can be attached to an endpoint with multiple counters (one counter per service allowed).
On every addon renewal, the respective counter will also be reset.
On every reset of the counter, the counter threshold will be reset with the master plan counter configuration.
The addon counter threshold can be modified from the endpoint CRM, which will be reset in the next counter reset.
Any modification on the Plan counter will reflect on the endpoint/customer in the next reset. This applies to both the base plan and addon counter.
The plan addon counter cannot be deleted if it is attached to any of the endpoints, similar to the base plan counter.