
[OEM] Create test plan
Create OEM Test Plan – Postpaid and Prepaid
On the top menu, click Plan to view the Rate Plan details. Refer to the following screen.
Figure 69 Plan
Note: By default, the Postpaid Plan screen is displayed.
Note: To create an OEM Test plan for prepaid connection, click the Prepaid tab, and follow the subsequent steps.
Click
to add a new postpaid plan. Refer to the following screen.
Figure 70 Add Plan
After clicking the button, the following screen is displayed.
Figure 71 Rate plan – Base
Note: By default, the Plan type is selected as Base.
Select the Plan type as
Test. Refer to the following screen.
Figure 72 OEM plan – Test
Enter or select the following information in the corresponding fields. Fields marked with "
|" are mandatory.
Field | Description |
|---|---|
Basic Information | |
Plan Type | Test Plan - Test plans are the OEM plans attached during provisioning. An endpoint can have only one Test plan. |
Plan Name | Enter a name for the Plan |
Status | Select the plan status in the drop-down list. For example, Active or In-Active. |
Description | Enter the brief description of the plan. |
Currency | Select the currency for the OEM Test plan |
Destination Group | Select the Destination Group in the drop-down list. |
Click
Next.
The ADVANCE details screen is displayed.
Figure 73 Advance details
Select
Benefits to add Benefit to the OEM test plan and click Add New Benefit to add a benefit. Refer to the following screen
Figure 74 Add New Benefits
10. After clicking the button, the following screen is displayed.
Figure 75 Add Benefits
11. Enter or select the following information in the corresponding fields. Fields marked "|'are mandatory.
Field | Description |
Benefit category | Select the Benefit Category in the drop-down list. |
Benefit | Based on the Benefit category selected, select the Benefit type. |
Value (MB) | Based on the Benefit selected, the corresponding value field is displayed. For example, this field is displayed when you select "Data" or “NB-IOT” as Benefit |
Value (Count) | Based on the Benefit selected, the corresponding value field is displayed. For example, this field is displayed when you select "SMS" as Benefit |
Action | Select an Action to be done with the benefits on the account. |
12. Click ADD to add the Benefit. Refer to the following screen.
Figure 76 Add Benefit
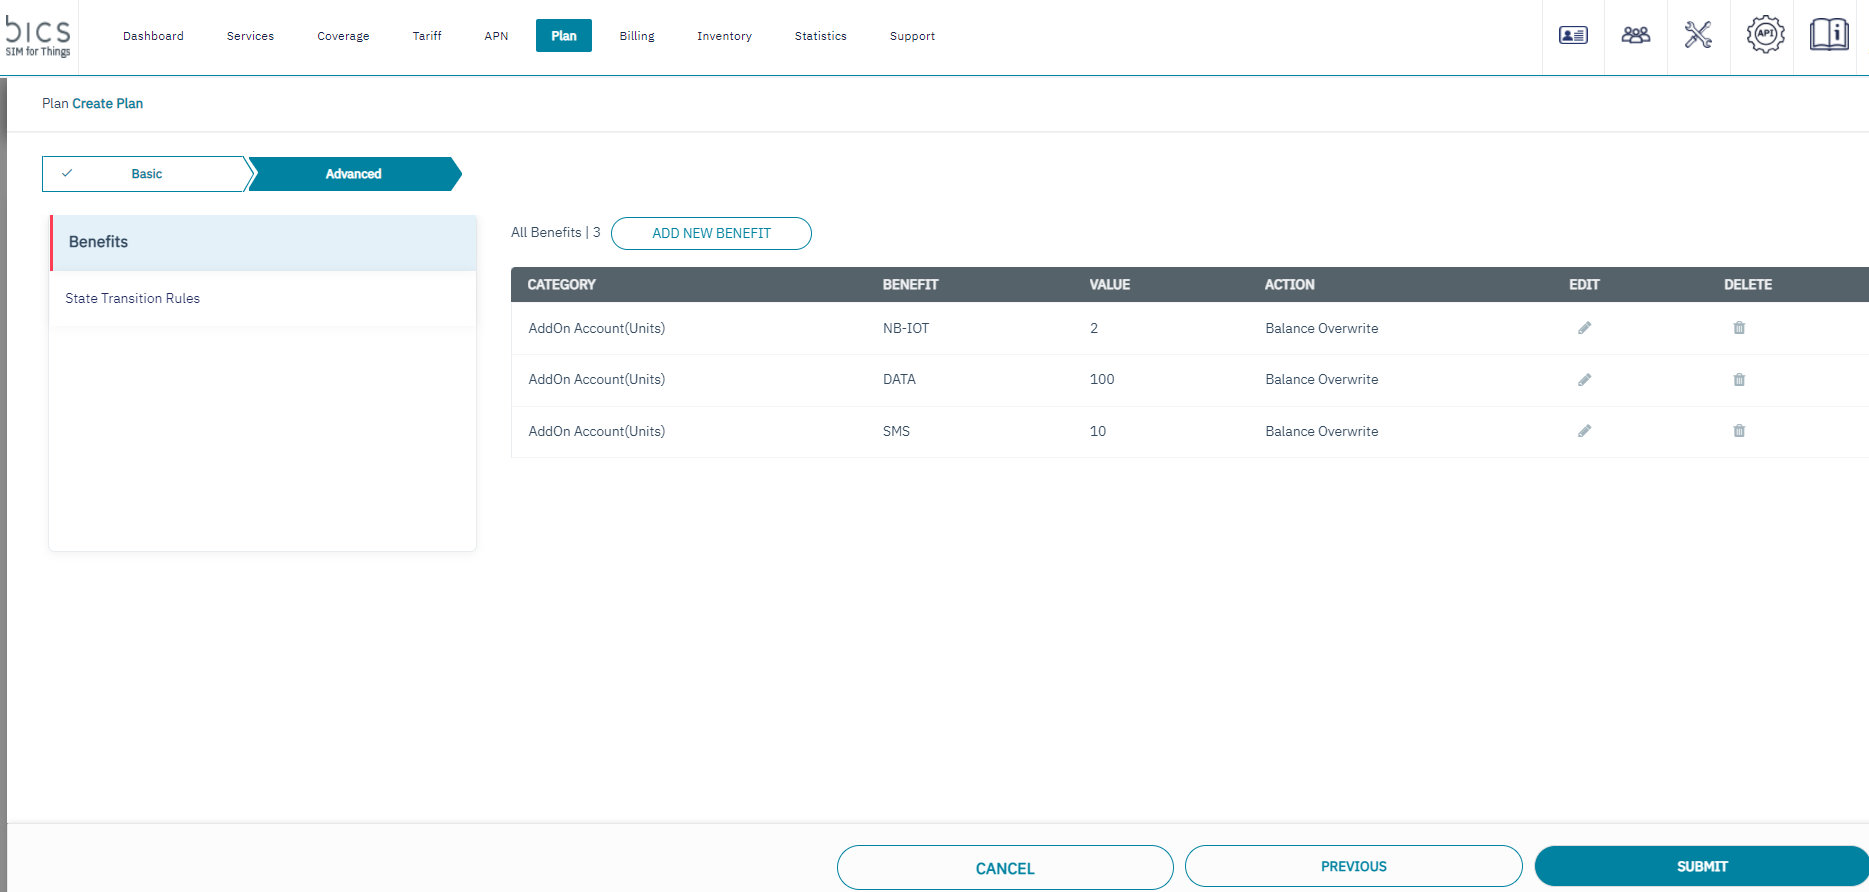
Figure 77 Benefits
13. On the Benefit screen, click
to edit the Benefit details.
14. On the Benefit screen, click
to delete the Benefit details.
15. After adding benefits, select State Transition Rules and click on Add Rule for adding next state rules for OEM test plan.
Refer to the following screen.
Figure 78 Adding State Transition Rules
16. After clicking on Add Rule following screen displayed.
Figure 79 State Transition Rule types
State Transition Rule has three values in the dropdown.
Validity - OEM endpoints state transition and change of plan from Test to Inventory plan happens based on the validity specified.
Benefit Exhaustion – OEM endpoints state transition and change of plan happens based on the usage of specific benefit exhaustion.
Usage under Base Plan Coverage – OEM endpoint state transition happens when a charging request initiates from an operational (Base plan) coverage.
17. Enter or select the following information in the corresponding fields. Fields marked "|'are mandatory.
Based on the state transition rule selection following fields appears.
Validity
When you select State Transition rule as "Validity", the following fields are displayed
Field | Description |
|---|---|
Fixed period after activation | There will be two sub – fields for fixed period after activation.
|
Figure 80 State Transition Rule – Validity
Benefit Exhaustion
When you select State Transition rule as "Benefit Exhaustion", the following details are displayed.
Field | Description |
|---|---|
Plan Benefit Exhaustion | SMS, Data and NB-IOT will be listed in the dropdown. |
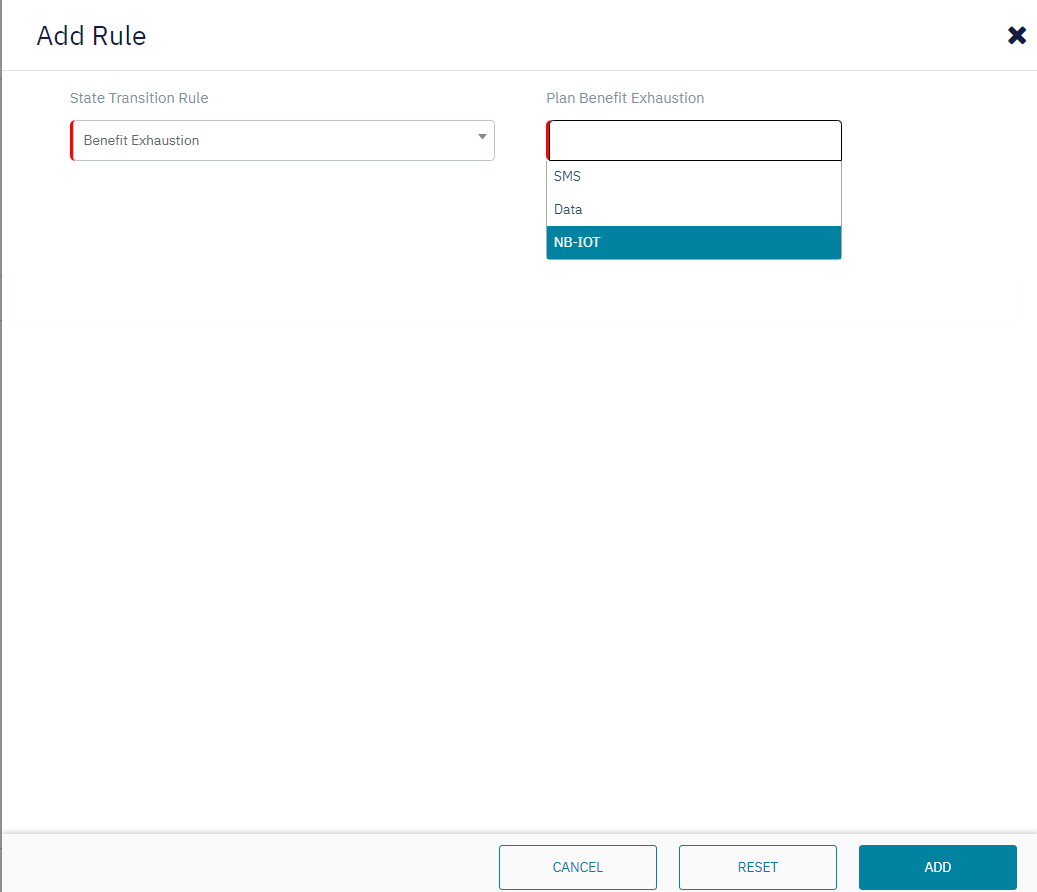
Figure 81 State Transition Rule – Benefit Exhaustion
Configuring Data, SMS and NB-IOT benefits and Data as benefit exhaustion rule is allowed.
Configuring Data, SMS and NB-IOT benefits and SMS as benefit exhaustion rule is allowed.
-Configuring Data, SMS and NB-IOT benefits and NB-IOT as benefit exhaustion rule is allowed.
Usage under Base Plan Coverage
Select usage under base plan coverage as state transition rule and click on add.
Figure 82 State Transition Rule – Usage under Base Plan Coverage
18. After clicking Add following screen appears.
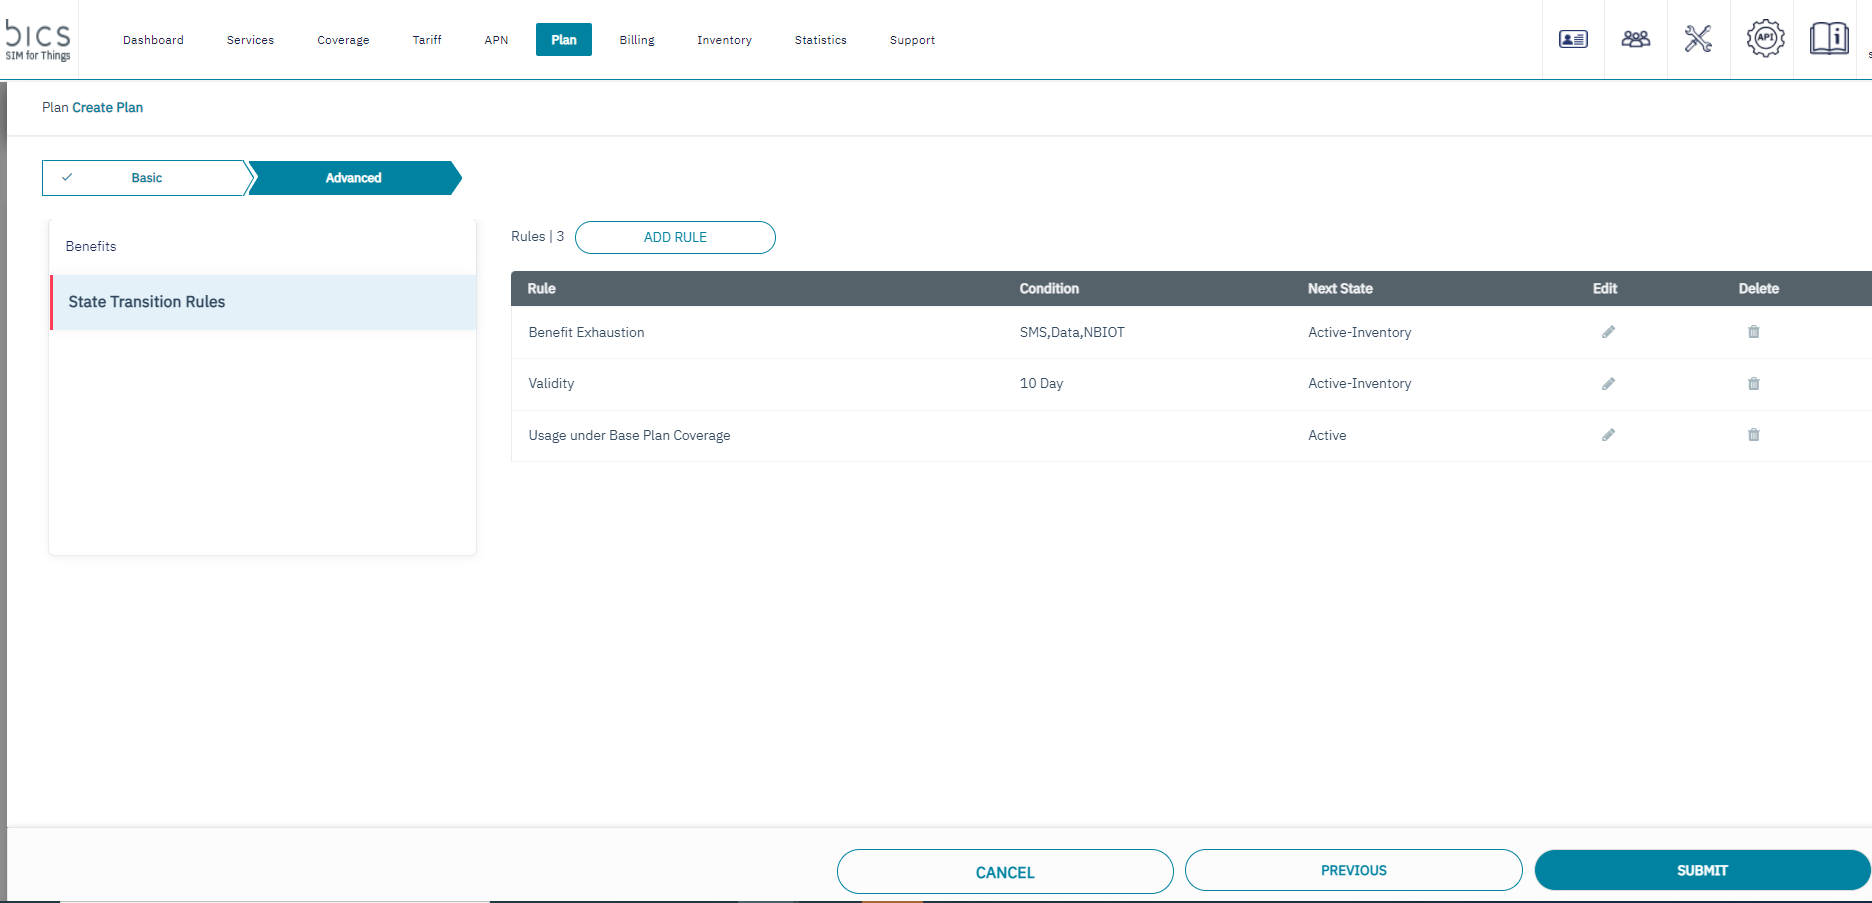
Figure 83 State Transition Rules
19. After adding State Transition Rules, the following details are displayed on the screen.
Field | Description |
|---|---|
State Transition Rule | Indicates the state transition rules added.
|
Condition | Indicates the condition of each state transition rule
|
Next State | This field will be automatically populated based on the rule creation.
|
to edit the Benefit Exhaustion, Validity, Usage under Base Plan Coverage details. | |
to delete the Benefit Exhaustion, Validity, usage under Base Plan Coverage rules. |
20. Click Submit.
A confirmation message is displayed, indicating that the OEM Test plan is created successfully.
Figure 84 Confirmation Message
21. In the OEM Test Plan without adding state transition rule if submit button is clicked, we get a warning message. Refer to the following screen.
Figure 85 Warning Message
If no state transition rules configured in the test plan, then endpoint state change must be performed manually.
22. Both Benefits and State Transition Rule – 'benefit exhaustion' should match with same type of benefits if not OEM Plan creation will not be success. If there is a mismatch in benefit type gets an error message. Refer to the following screen.
Figure 86 Error Message