
Plan Creation
Once you get an access to the portal, you can create accounts for your customers. Prior being able to create your customer account, you have to configure a Plan for it, a Plan must be assigned to each account you created. The Plan consolidates all restrictions and benefits, coverage and tariffs for an account
Step 1: Log in to the portal
Visit https://sft.bics.com/and sign in with your username and password. Google Chrome is the recommended browser by BICS
Step 2: Create a Service Profile
NOTE: A Service Profile is a profile where you define the services and functionality you want an account to have

Service Profile Name: Enter text
Category: Select Base.
Later you can create AddOn Plan with special AddOn Service Profile and assign it to the account. It allows you to give an extra service packet over the base plan. But a Base Plan is mandatory.Status: Select Active
Service: Select ‘DATA’, ‘NB-IoT', 'SMS-MO’ and ‘SMS-MT’ from the drop-down list. You can select one or few services
Access Type: ‘2G/3G/4G/5G’ or you can limit access type for the account by selecting ‘2G’, ‘2G/3G’ or ‘2G/3G/4G’
Step 3: Create a Destination Group
The Destination Group contains all countries/networks you want to make accessible for your customer, this Destination Group will define the available coverage for the account

Enter Destination Group name
Attach the network to the Destination Group by selecting “On” or “ATTACH ALL”
Once all desired networks are attached, click submit
Step 4: Create Rate Zones and Tariffs
Select on 'Tariff' tab

This tab is divided in 2 parts “Price” and “Cost”.
“Cost” indicates the tariffs, which BICS applies to you on your reseller account.
“Price” allows you to configure the tariffs, which you will apply for your customer(s). You have the possibility to define different prices for each customer.
To ease the pricing, the countries/networks will be grouped in “Rate Zones”, actual tariff will be assigned to the Rate Zone.
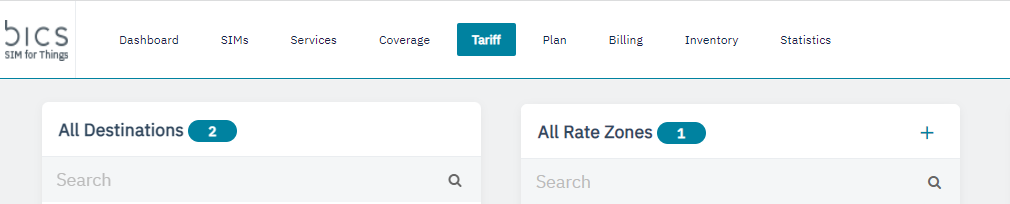
1. Select 'Rate Zones;
2. Select your Destination Group;
3. Select ‘+' in 'All Rate Zones’ menu;
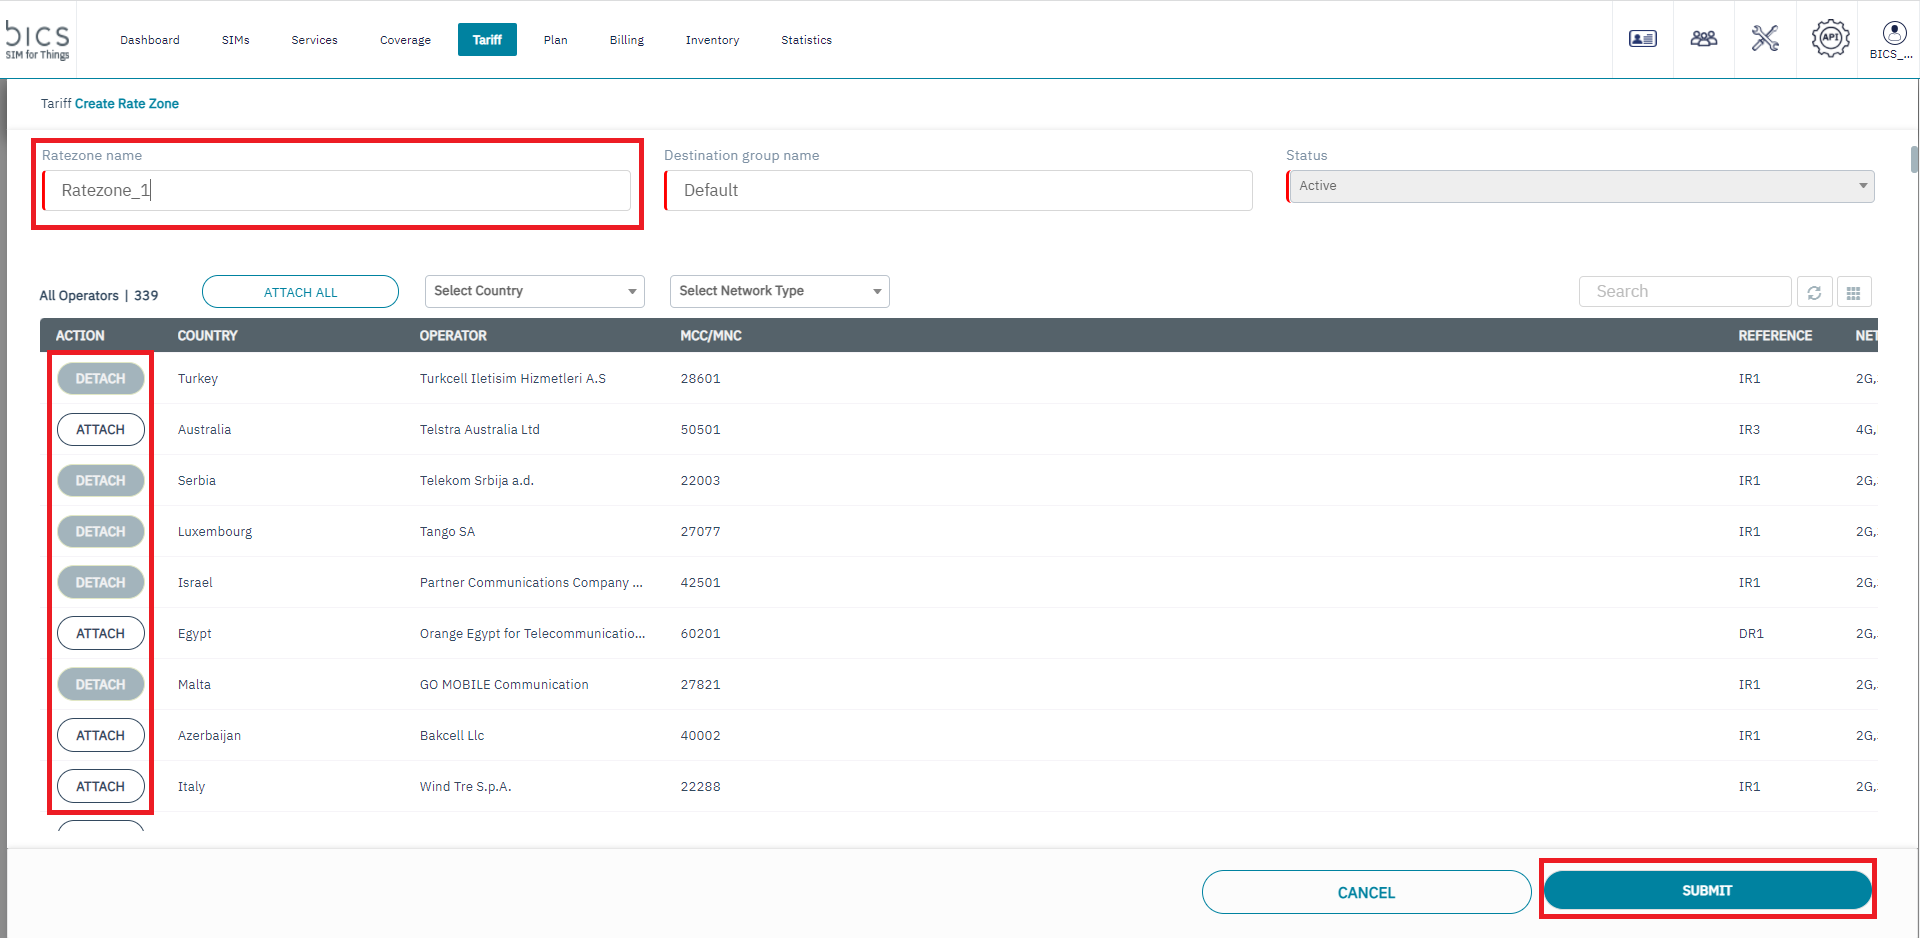
4. Enter Ratezone name
5. Attach all the networks which would have the same price for DATA and SMS
6. Click 'Submit'
7. Click ‘Create New Tariff' under the 'Tariff’ tab:
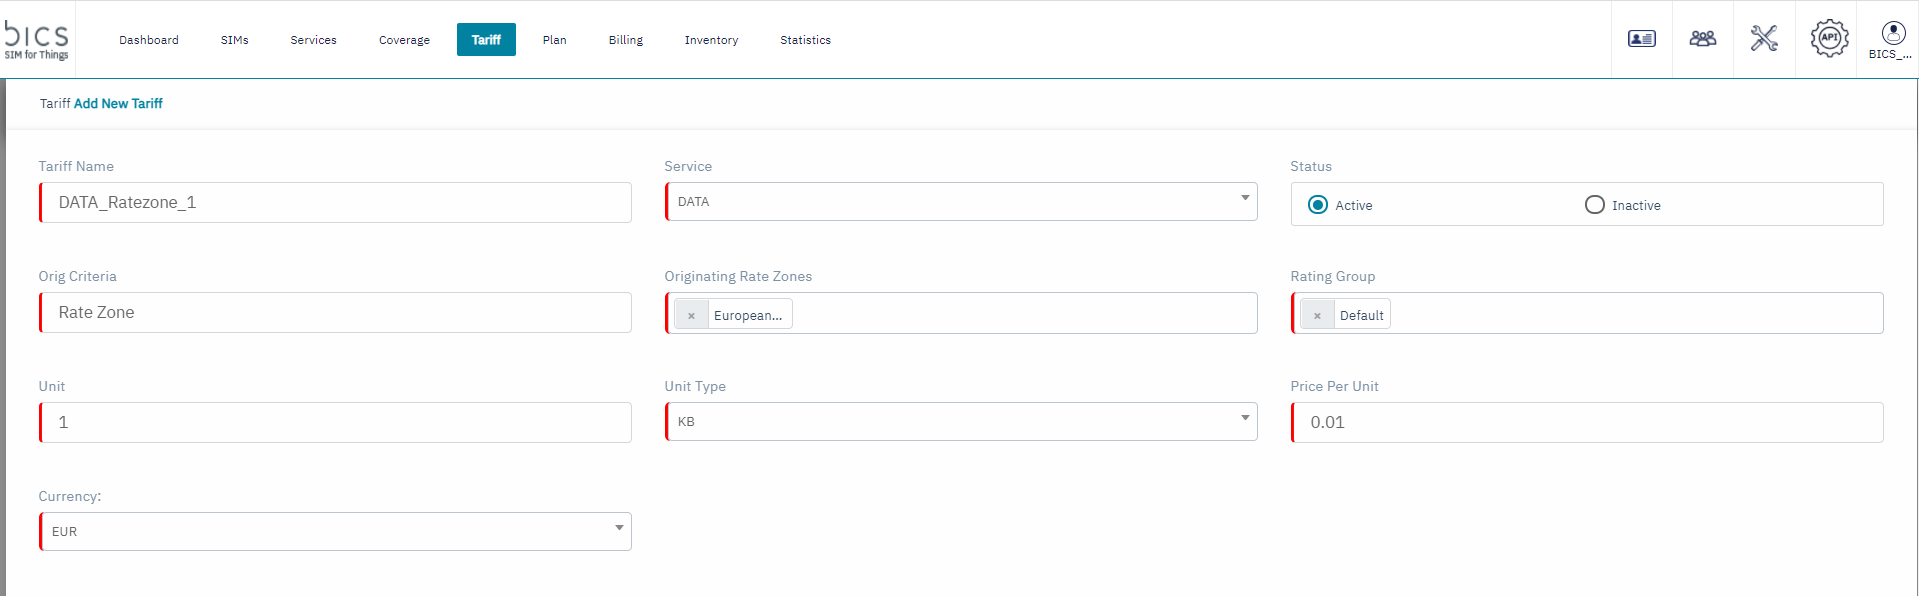
Tariff Name: Enter text (small tip: better to mention the service and Ratezone name);
Category: Select “DATA” or “SMS”
Status: Select Active
Orig Criteria: Rate Zone
Originating Rate Zone: Select corresponding Rate Zone from drop-down list
For Data:
Rating Group: Default.
Unit: The value of charged data
Unit Type: Select “MB” or “KB”
Price Per Unit: The actual price (in this case 0.5 Euro per 1 MB)
Currency: Select “EUR” or “USD”
For SMS:
Dest Criteria: ALL
Price Per Unit: enter a price for 1 SMS
Currency: “EUR” or “USD”
Step 5: Create a Plan
The Plan contains the Service Profile, Rate Zones and Tariffs.
There are 2 types of Plan: prepaid and postpaid which will determine the type of commercial relation you will have with your customer in terms of payment. “Prepaid” accounts will require an initial top-up of the account balance and the balance will decrease function of the actual usage. “Postpaid” accounts will accumulate the actual cost of usage on monthly basis.
To create a Plan:
Select the ‘Plan’ tab
Select ‘Prepaid' or 'Postpaid’
Select '+'

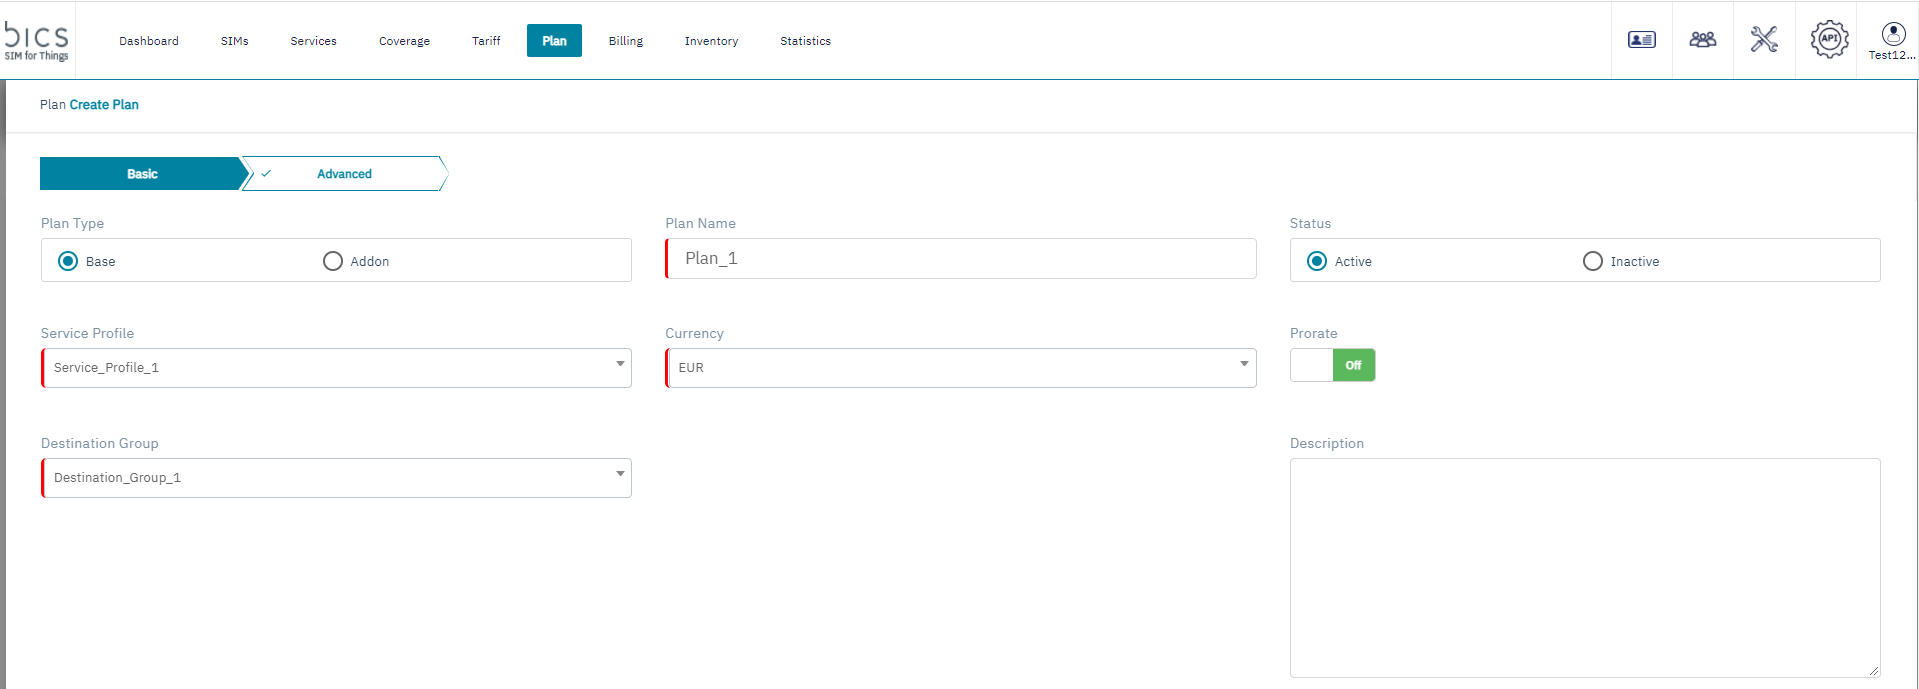
Plan Type: Select Base.
Later you can create AddOn Plan and assign it to the account. It allows you to give an extra service packet over the base plan. But Base Plan is mandatory.
Plan Name: Enter text.
Status: Select Active.
Service Profile: Select corresponding Service Profile
Currency: Select “EUR” or “USD”
Destination Group: Select corresponding Destination Group
4. Click ‘Next’
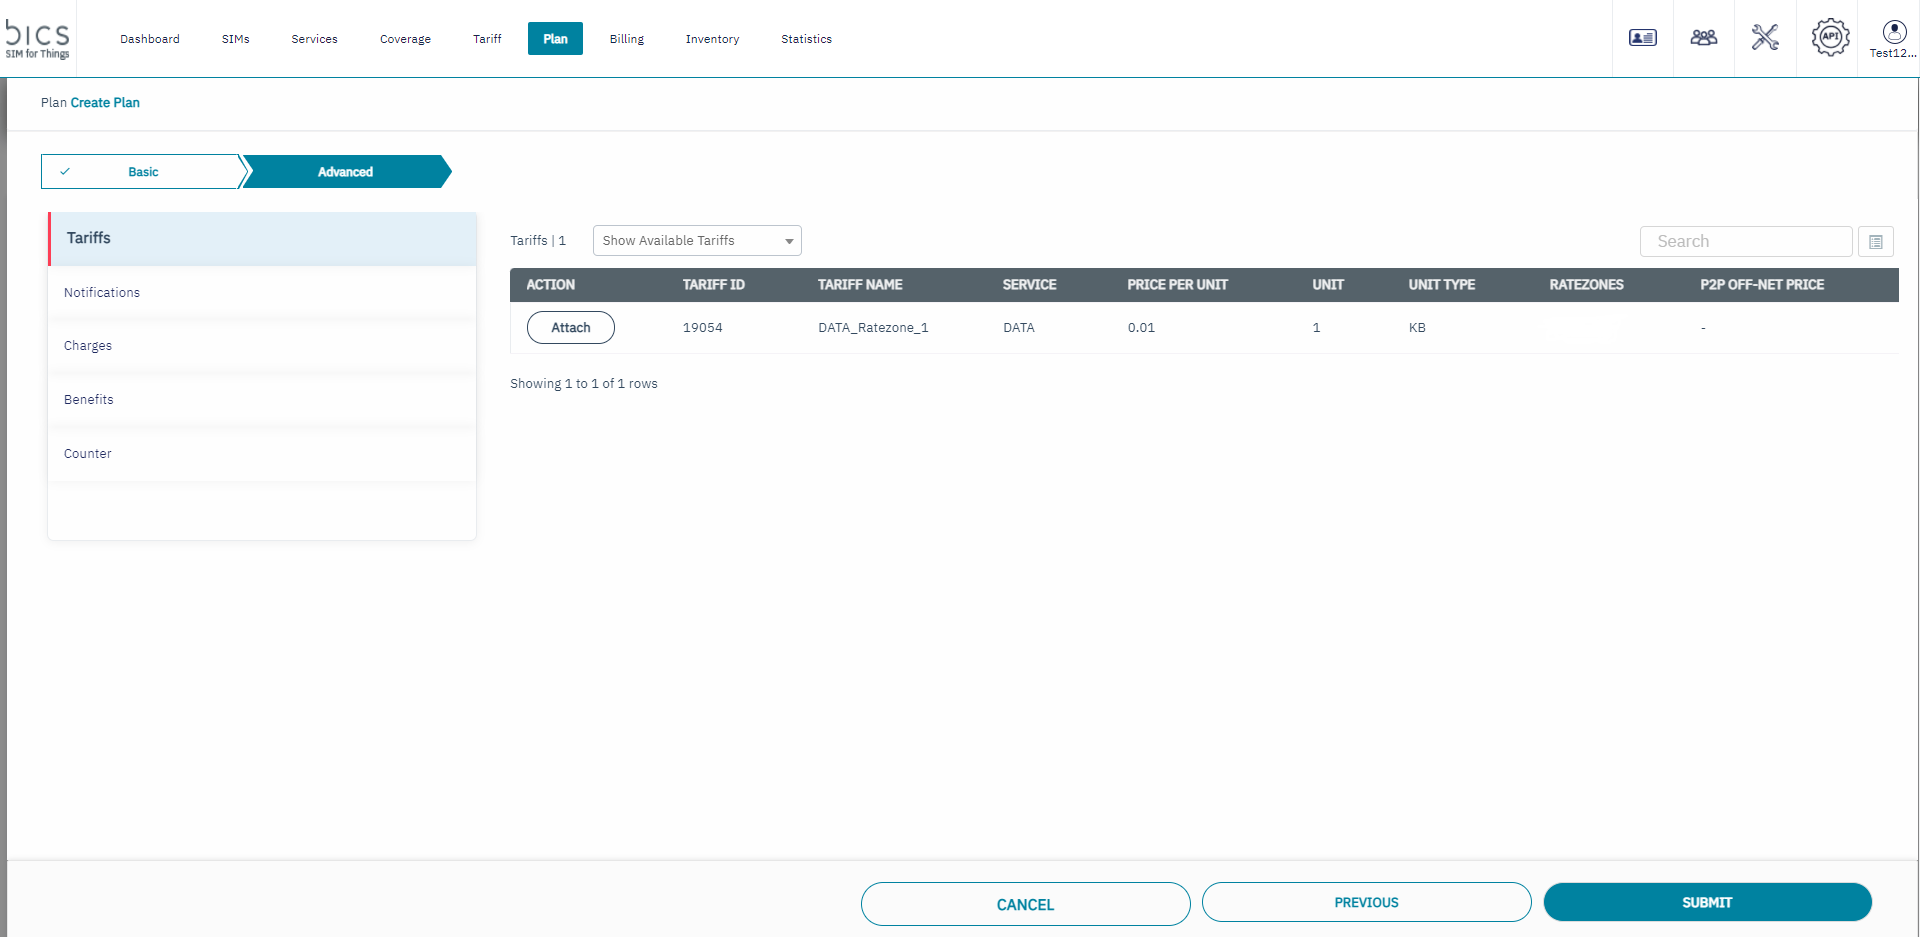
5. Attach corresponding tariffs and click ‘Submit’
There are a few more functions available in Plan, which are not mandatory, but could be useful: Notifications, Charges, Benefits and Counters.
You can set up different types of notifications and send it the customer user emails and to additional recipients.