
[RES] Create Destination Group
1. On the top menu, click Coverage to view the Destination group details. Refer to the following screen.
Figure 1 Coverage
2. On the Destination Group screen, click Create New Destination. Refer to the following screen.
Figure 2 Create Destination Group
3. After clicking the button, the Create Destination Group screen is displayed.
Figure 3 Create Destination Group
Note: The operators available under reseller's current plan are displayed in the Create Destination Group screen.
4. Enter or select the following information in the corresponding fields.
Field | Description |
|---|---|
Destination Group Name | Enter a name for the Destination Group. |
You can filter the operator details pertaining to a specific country using the Select Country drop-down list. For example, select Belgium to view the operators available for Belgium.
Figure 4 Select Country
You can filter a specific operator using the Select Operator drop-down list. For example, select Belgium Proximus to view that particular operator.
Figure 5 Select Operator
You can filter the operator details for a specific Network in the Select Network Type drop-down list. For example, select 2G to view the operators available for 2G Network.
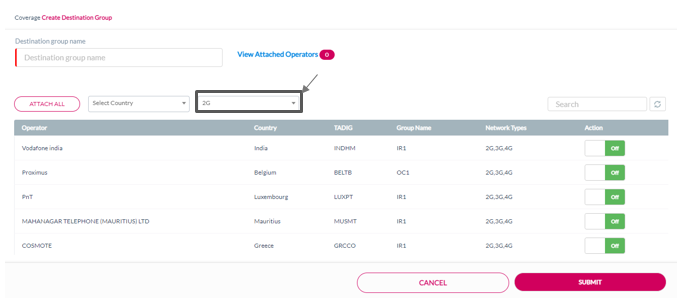
Figure 6 Select Network Type
5. Push the Action button to Attach or Detach an operator to the Destination group. Refer to the following screen
Figure 7 Attach or Detach Operator
6. Click AttachAll to attach all the listed operators to the Destination Group. Refer to the following screen.
Figure 8 Attach Operator
Click DetachAll to detach all the listed operators from the Destination Group. Refer to the following screen
Figure 9 Detach Operator
On the Create Destination Group screen, click View Attached Operators to view the operators attached to the Destination Group.
Figure 10 View Attached Operators
7. Click Submit. A confirmation message is displayed, indicating that the Destination Group is created successfully.
Figure 11 Confirmation
If you click Submit without entering the Destination Group name, the following message is displayed.
Figure 12 Error message
If you click Submit without attaching operator to the Destination Group, the following error message is displayed.
Figure 13 Error message
View Attached Operator
On the Create Destination Group screen, click View Attached Operators to view the details of the operators attached to the Destination Group. Refer to the following screen.
Figure 14 View Attached Operators
After clicking the button, the List of Attached Operators screen is displayed.
Figure 15 List of Attached Operators
Push the Action button to Attach or Detach an operator. Refer to the following screen.
Figure 16 Attach or Detach Operator
To detach all the listed operators from the Destination Group, click Detach All. Refer to the following screen.
Figure 17 Detach/Detach all operators